



Fluent Forms email notifications are the emails a form sends after each entry: one to your team, and usually one to the person who filled the form in. A handful of fields in each form’s settings decide whether the email arrives, who it seems to come from, and where a reply goes.
This guide sets up both notices in the free plugin, field by field, then tests them properly.
Key Takeaways
- Each form has its own notification list under Settings & Integrations, then Email Notifications, and each notice has its own switch.
- The team notice goes to an address you type, and the visitor email uses Select a Field to reach the address the visitor entered.
- Open Advanced on every notification and fill in From Name, From Email and Reply To, because blanks there cause most of the odd emails we see.
- The thank-you message on screen proves the entry was saved, not that any email was sent.
- Test with your own address, then check the entry’s Submission Logs and your mail log.
Where do Fluent Forms notifications live?
In WordPress, edit the form, open the Settings & Integrations tab and choose Email Notifications in the left menu. The list shows each notification’s Status, Name and Subject, and the Add Notification button creates a new one.
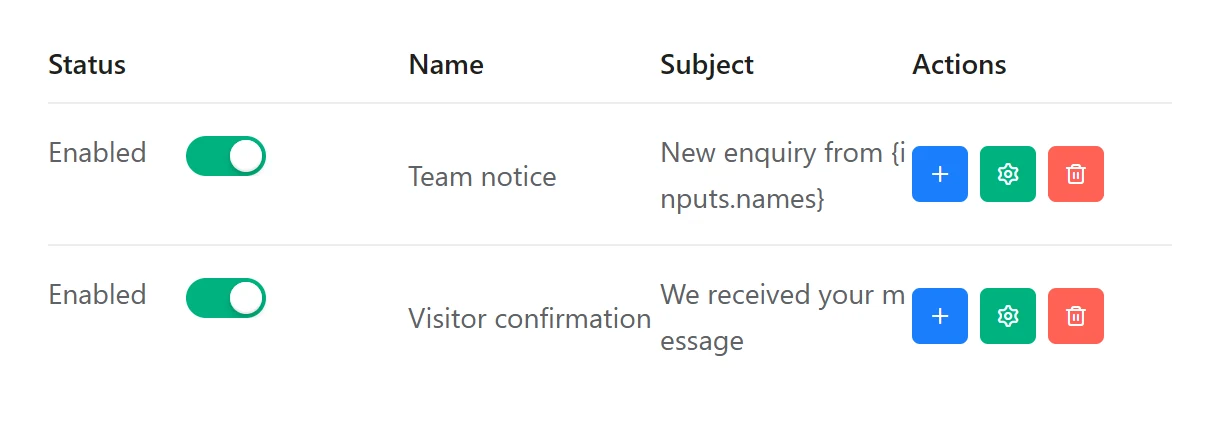
Fluent Forms’ guide to admin and user notifications says “Here, you can see one Admin Notification Email is already created by default.” We have also seen new forms with an empty list, so look before you assume a notice exists, and add one if there is nothing there.
How do you set up the team notice?
Open the existing admin notice, or click Add Notification, and work down the settings in order:
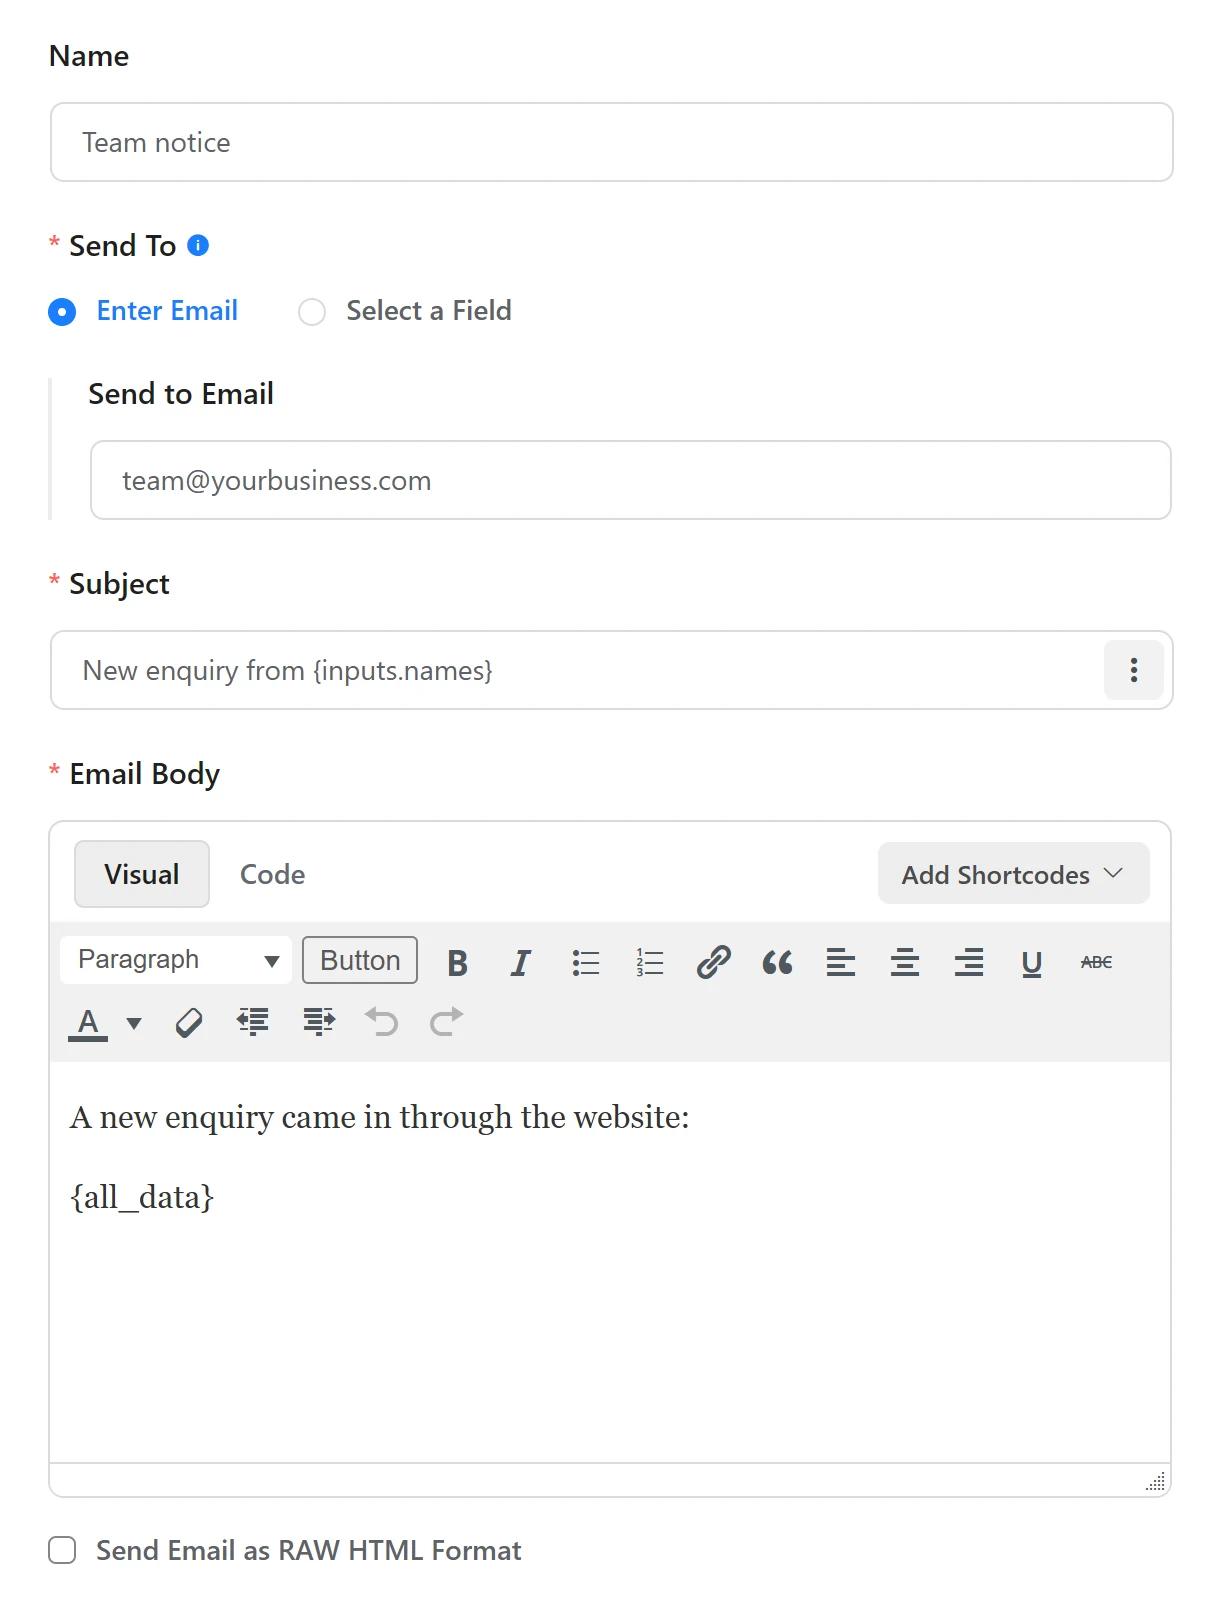
- Name: something clear, such as
Team notice. - Send To: the free plugin offers two options, Enter Email and Select a Field. Choose Enter Email, then type the inbox that handles enquiries into Send to Email. The guide says “You can also send notifications to multiple recipients by separating email addresses with a comma (,).”
- Subject: add a field shortcode so each email is easy to tell apart, such as
New enquiry from {inputs.names}. Fluent Forms’ shortcode reference describes{inputs.names}as “Displays the full name field.” - Email Body: use Add Shortcodes to insert
{all_data}, which “Displays all submitted data from the form”, so a field added later still appears.
The exact shortcode depends on how each field is named, so pick it from the Add Shortcodes list rather than typing it. The default admin notice often sends to {wp.admin_email}, which the guide says “will automatically use the default admin email set in your WordPress settings.” A common pattern we fix is that address belonging to a former developer or staff member, so enquiries reach nobody who reads them.
What goes in the Advanced section?
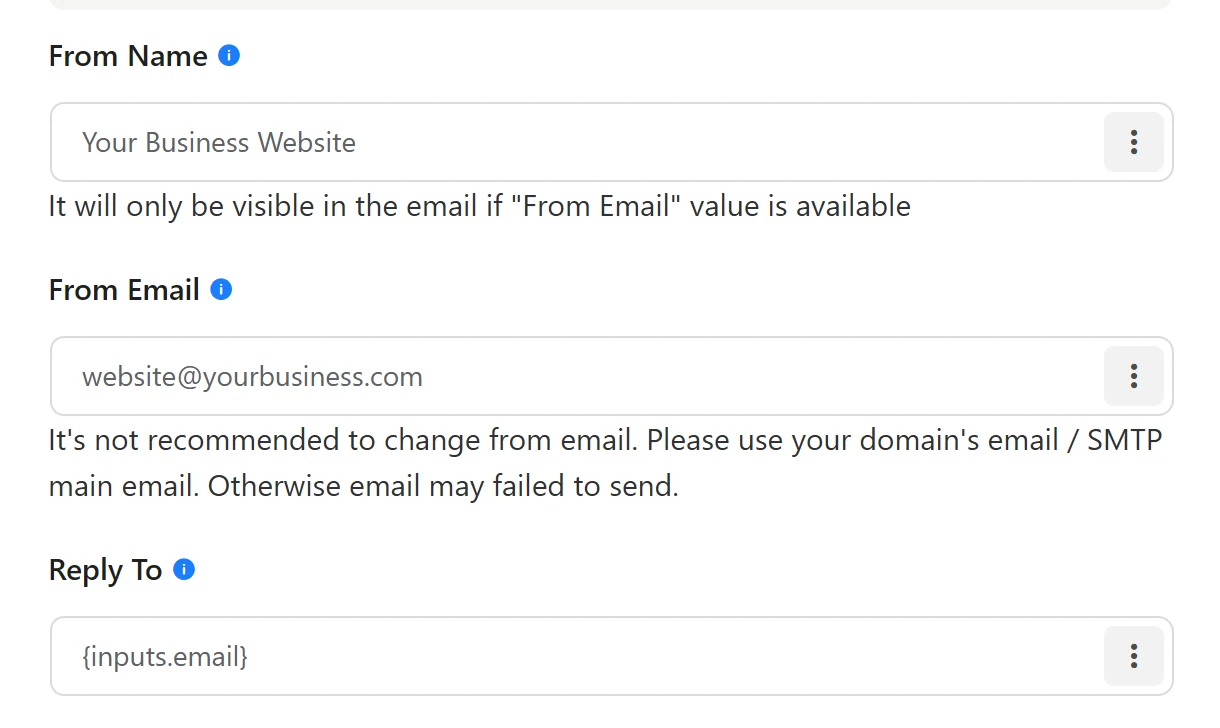
From Name, From Email, Reply To, BCC and CC sit in a collapsed section called Advanced, below Media File Attachments. It is easy to scroll past, so open it every time.
| Field | Team notice | Why |
|---|---|---|
| From Name | Your business name, or Website form |
Shows where it came from |
| From Email | The address your site’s mail connection sends as | Without it, the From Name is not shown |
| Reply To | The visitor’s email field, such as {inputs.email} |
Pressing Reply answers the visitor |
| BCC and CC | Usually empty | Add a second inbox only if it needs a copy |
The reference describes {inputs.email} as “Displays the email address entered by the user.” For an empty Reply To, the guide warns: “If you leave this field blank, the user reply will be sent to the Default Email you set for your site.” That is usually the website’s own account, so the reply never reaches the person who asked.
A common pattern we fix is a From Name typed in with From Email left blank, and the email arriving under the mail account’s default name instead. The settings screen explains why: under From Name it says the name is only visible when a From Email value is available, and under From Email it asks for your domain’s email or the SMTP account’s main email. Set From Email to the exact address your site’s mail connection sends as, and the From Name will show.
How do you send the visitor a confirmation email?
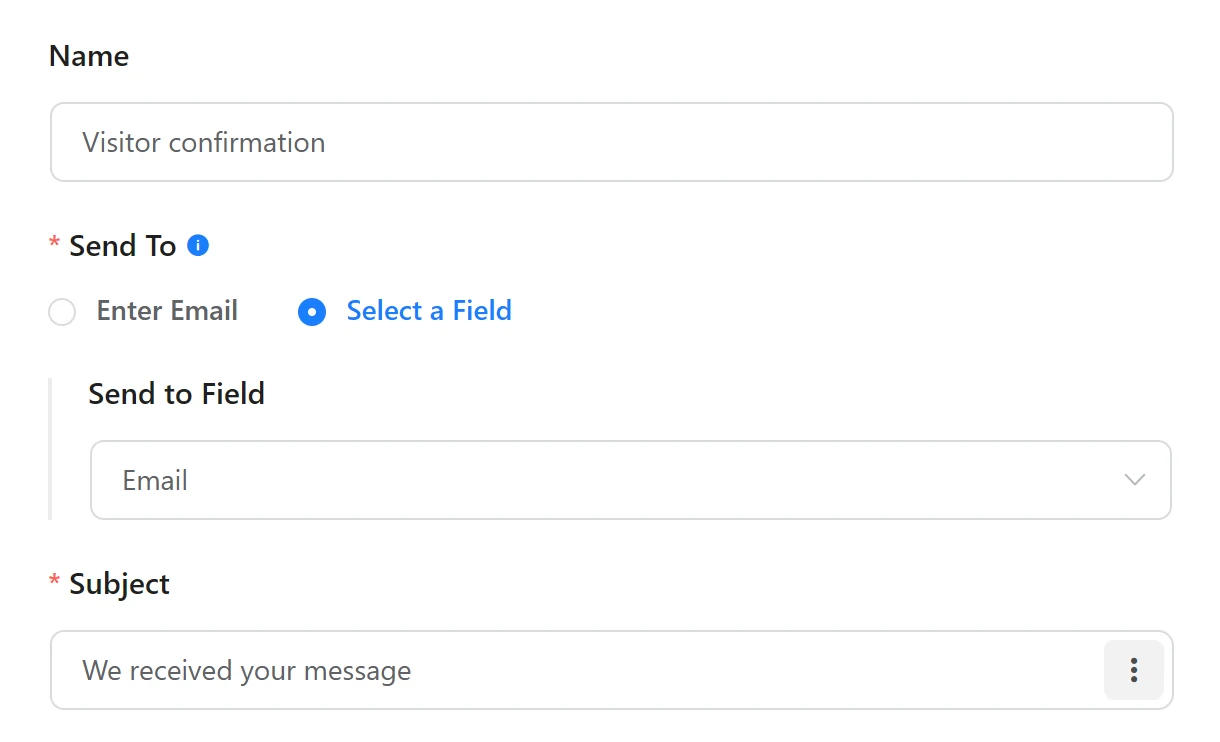
Add a second notification. Fluent Forms’ WordPress.org listing describes the feature this way: “Get notified every time someone submits a form and also send a confirmation email to the one who fills out the form.”
- Name:
Visitor confirmation. - Send To: choose Select a Field, then pick the form’s email field. The guide says to “define an Email input field in your form whose value will receive the confirmation email.”
- Subject and Email Body: a short thank-you and what happens next, plus
{all_data}if the visitor should get a copy. - Advanced: From Name as your business, From Email as the site’s sending address, and Reply To as the team inbox, so a visitor who replies reaches a person.
Make the email field required, or a visitor who skips it gets no confirmation and nothing warns you.
In the free plugin, Media File Attachments is marked Require Pro Version, so attaching a PDF needs Fluent Forms Pro.
Can a notification go to a different inbox based on an answer?
Only with Pro. In the free plugin the Conditional Logics panel on a notification says it is a Pro feature, and the WordPress.org listing puts “Conditional email routing” under “Features available in the Pro version”. With Pro, the guide says conditional logic ensures “notifications are sent only when the conditions are met”, which suits a department dropdown.
Is each notification switched on?
A notification can be saved switched off, and then it sends nothing. Fluent Forms’ troubleshooting guide says “The very first troubleshooting you can do is check whether your Email Notification setting is enabled.” If a notice’s Status switch does not read Enabled, “turn on the Toggle switch and the notification will be Enabled.”
Changes only count once you click Save Notification, so check both switches after saving.
Does the thank-you message mean the email was sent?
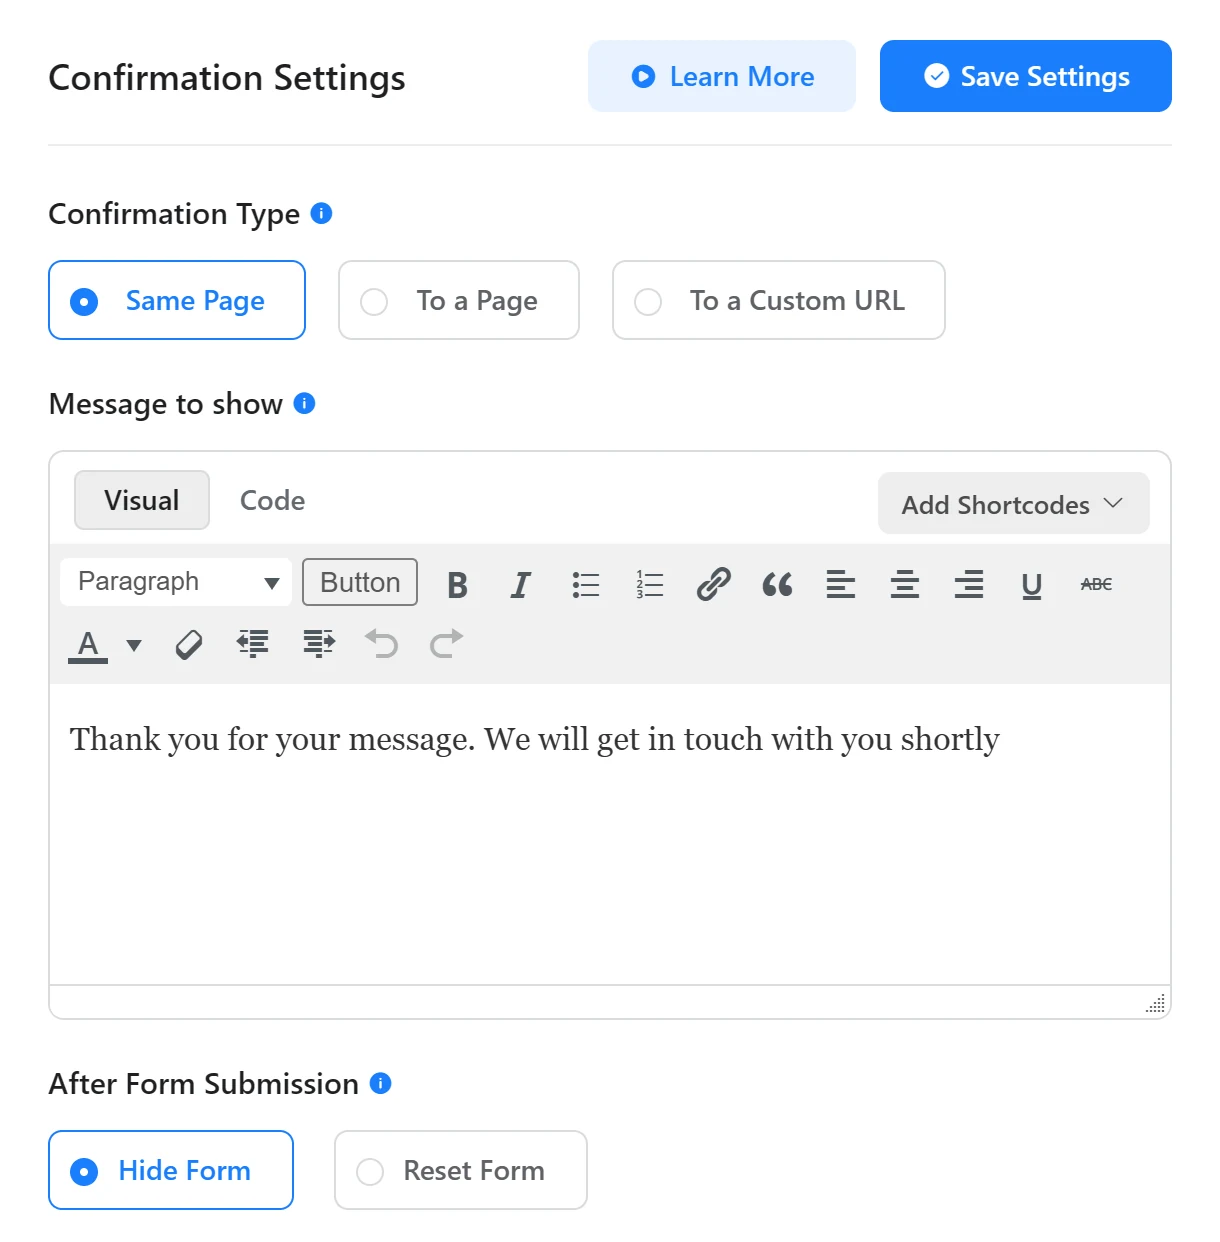
No. The Message to show, set under Settings, then Confirmation Settings, appears once the entry is saved and says nothing about email. A form can show a perfect thank-you while every notification fails.
WordPress’s own wp_mail() reference says “A true return value does not automatically mean that the user received the email successfully.”
How do you test Fluent Forms notifications properly?
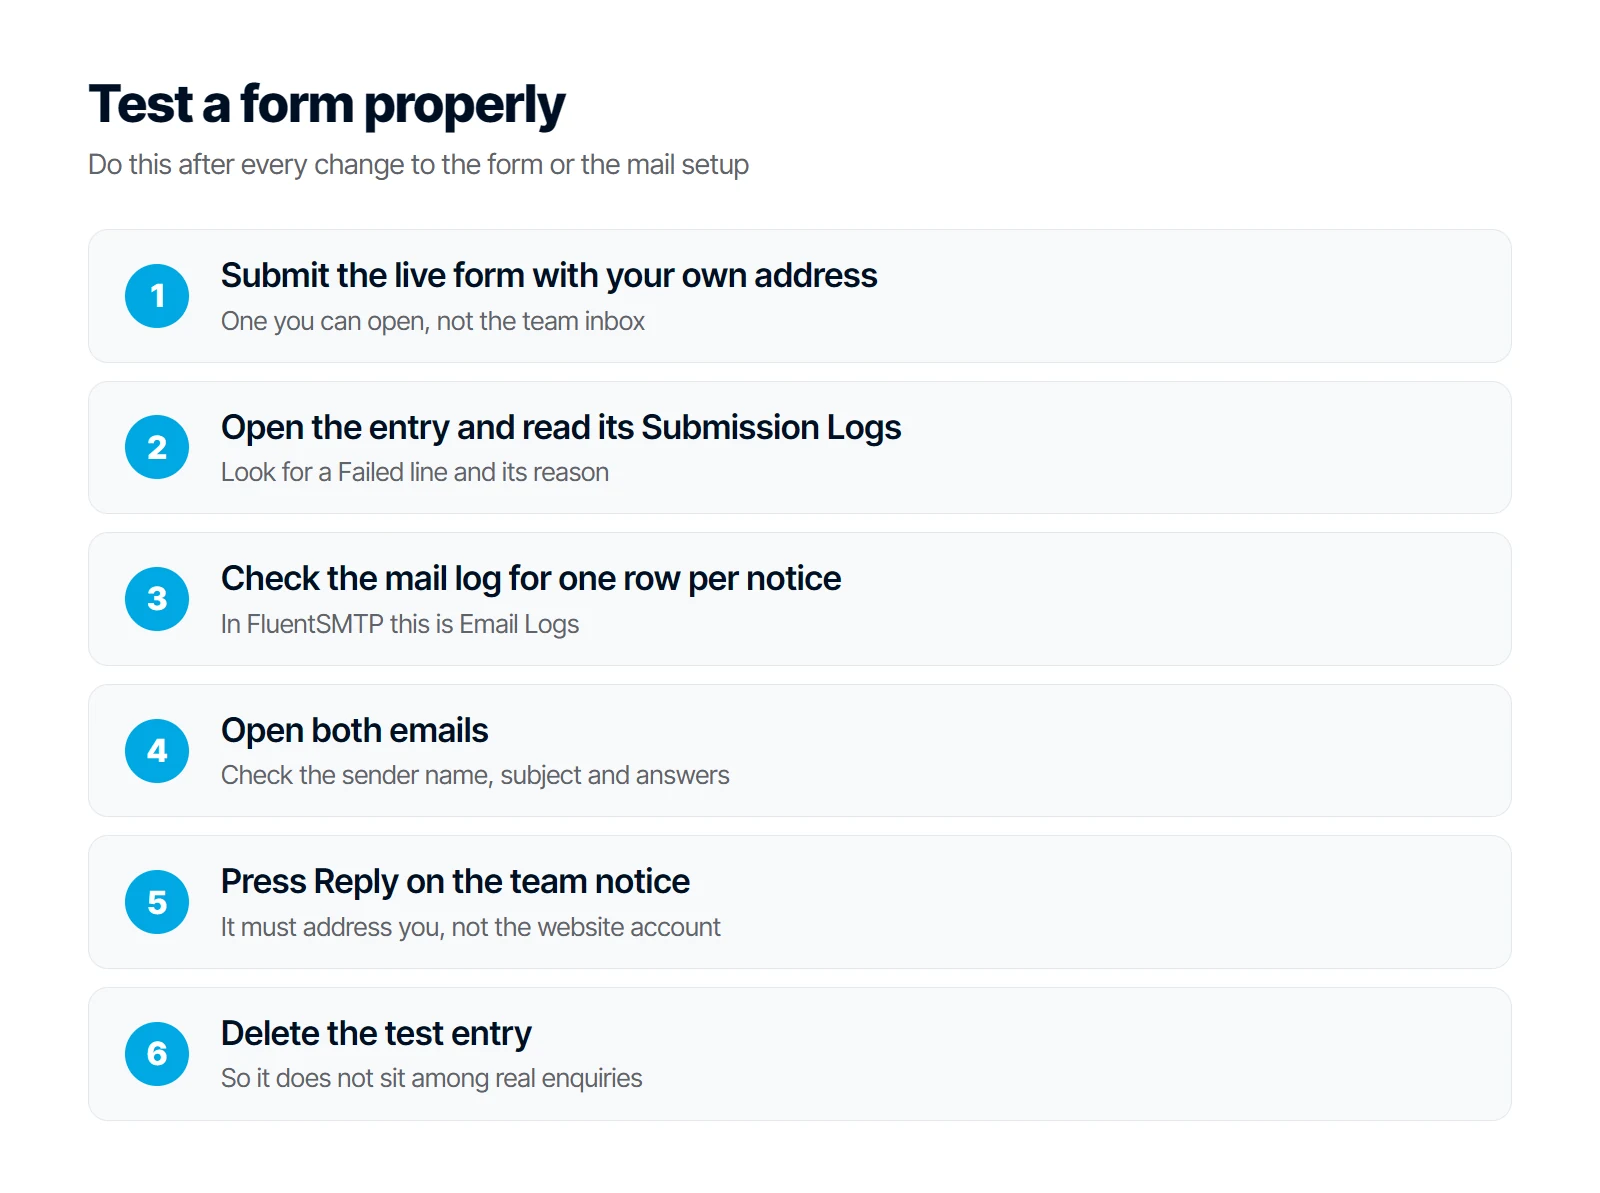
- Submit the live form with an address you can open that is not the team inbox.
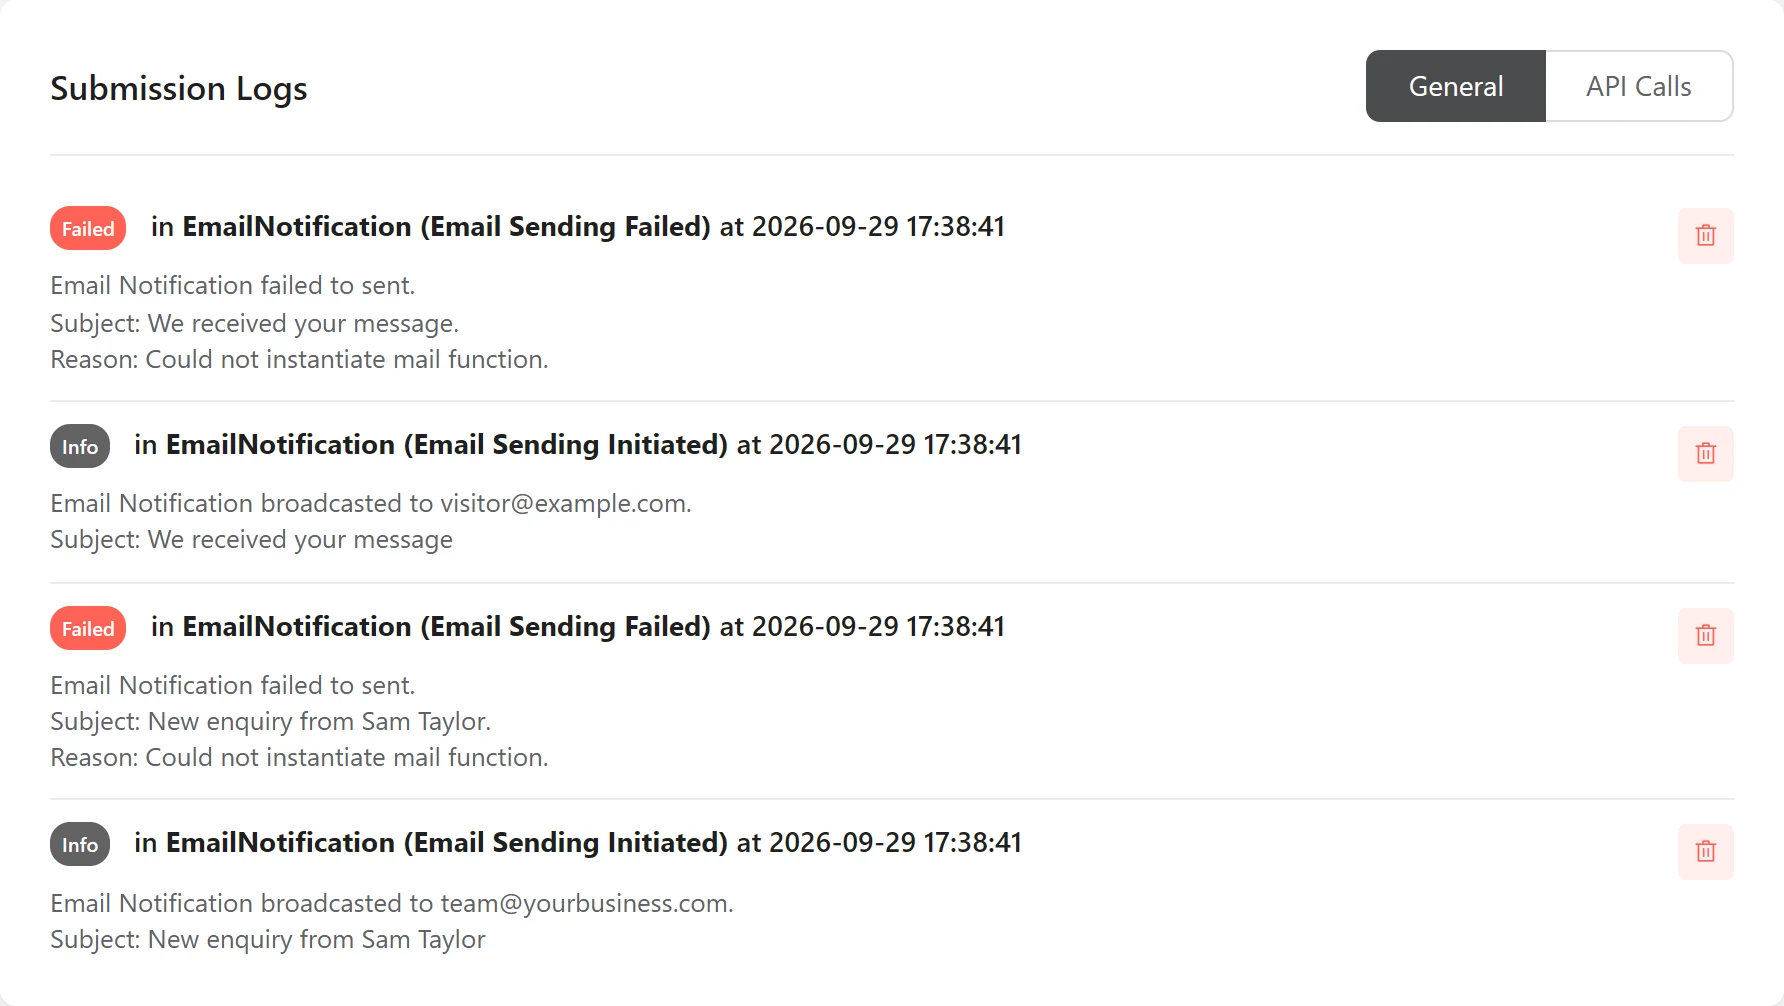
- Open the entry in Fluent Forms and scroll to its Submission Logs, newest line first. “Email Notification broadcasted” only means sending started: in our own test it appeared for both notices, and a “Failed” line with the reason followed each one.
- Open your mail log, which in FluentSMTP is Email Logs, and find one sent row for each notification. Its Email Logs guide notes “Logging must be on.”
- Open both emails and check the sender name, subject and answers.
- Press Reply on the team notice and confirm it is addressed to your test address, not the website account.
- Delete the test entry.
Why might the emails still not arrive?
Fluent Forms does not deliver email itself. It hands each notification to WordPress, which sends it through whatever mail connection the site has, and we often see sites still on the host’s default mail.
The troubleshooting guide says “We always recommend using an SMTP plugin in your WordPress site for better email deliverability.” To connect a real mail account, follow our guide to set up WordPress SMTP with Gmail.
What if a notification misbehaves?
| Symptom | Likely cause | Fix |
|---|---|---|
| The visitor gets nothing | The visitor notice is off, or missing | Switch it on, or add it with Select a Field |
| Reply on the team notice goes to the website account | Reply To is empty | Set Reply To to the visitor’s email field |
| The sender name is odd, or not your business | From Email is blank | Set From Email to the address the site sends as |
| Emails land in spam | The sending account or domain is not set up to send | Send through a real account on your domain |
| The notice goes to the wrong person | A typo in Send to Email, or the wrong field | Correct it, then test again |
| The entry is saved but no email arrives | The mail connection is failing | Read the error in Submission Logs and the mail log |
Submission Logs say Could not instantiate mail function |
The server cannot send mail on its own | Connect a real mail account with an SMTP plugin |
Checklist before you call the form done
- The team notice exists, is switched on, and sends to an inbox someone reads.
- The subject carries the visitor’s name and the body carries
{all_data}. - In Advanced on the team notice, From Name, From Email and Reply To are all filled in.
- The visitor confirmation uses Select a Field with the form’s email field, and that field is required.
- In Advanced on the visitor confirmation, Reply To is the team inbox.
- Every change is saved with Save Notification.
- A test entry was sent, both logs checked, Reply tested, and the entry deleted.
Frequently Asked Questions
Does the free version of Fluent Forms send email notifications?
Yes. “Email notification” is listed among the “Powerful Features available in the Free Version” on its WordPress.org listing, while conditional sending and attachments are marked Pro.
Why not use the visitor’s address as the From Email?
Your site does not own that address, so the mail connection may rewrite it or the receiving inbox may distrust it. The settings screen advises your domain’s email, and Reply To already makes Reply answer the visitor.
How do I send a notification to more than one person?
Type several addresses into Send to Email, separated by commas, or use the CC and BCC fields in Advanced. The guide says you can “add an email address in the CC or BCC if you want to send a copy of the email to another person.”
Want someone to set up and check your forms?
Setting up the notices takes minutes, but keeping them right through staff and plugin changes is the part that slips. Our website maintenance service covers “Broken forms, links and layout issues fixed when found.” It also covers “Core, theme and plugin updates”, and you can read how we work or contact us about your forms first.